| BustedGear.com |
| Shop | Repairs | Manufacturers | Resources | iFAQs | About |
|
|
|||
| Roland® D-50 | 4: Key Contact Strips | ||
|---|---|---|---|
|
Last Page < |
Page Bottom ∨ |
Next Page > |
|
|
|
|||
|
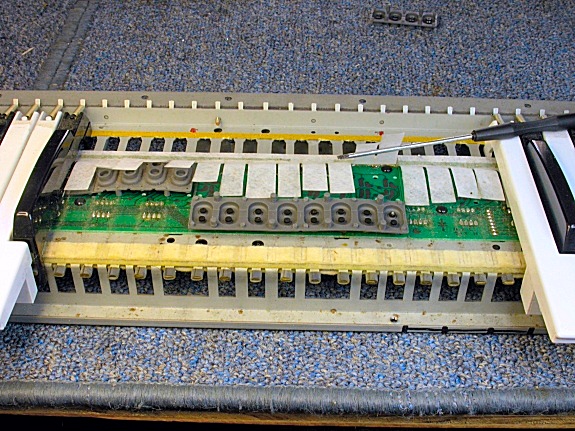
The Roland D-50 key contact strips are located directly under the keys. This photo shows one strip pulled off its printed circuit board (PCB) and turned upside down to expose the contacts. The rubber strips are very flexible. You can grab a strip at one end and gently pull it off its PCB. The strips have pips that poke into holes on the PCB. The pips will pop out of their holes, two by two, as you pull up on the strip. |
|
|---|---|
|
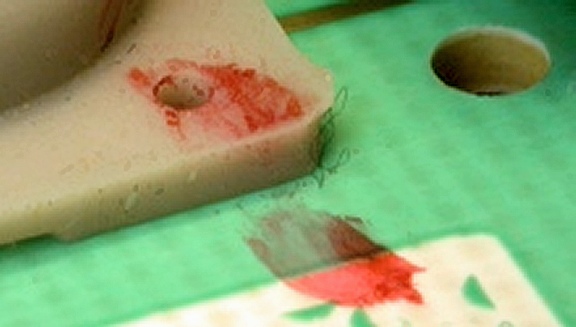
We mark a stripe on the rim of each strip we plan to remove (see right). The stripe makes it easy to correctly orient the strip when reinstalling it. Strips will fit onto the board in two different ways but only one of the ways is mechanically correct. |
|
|
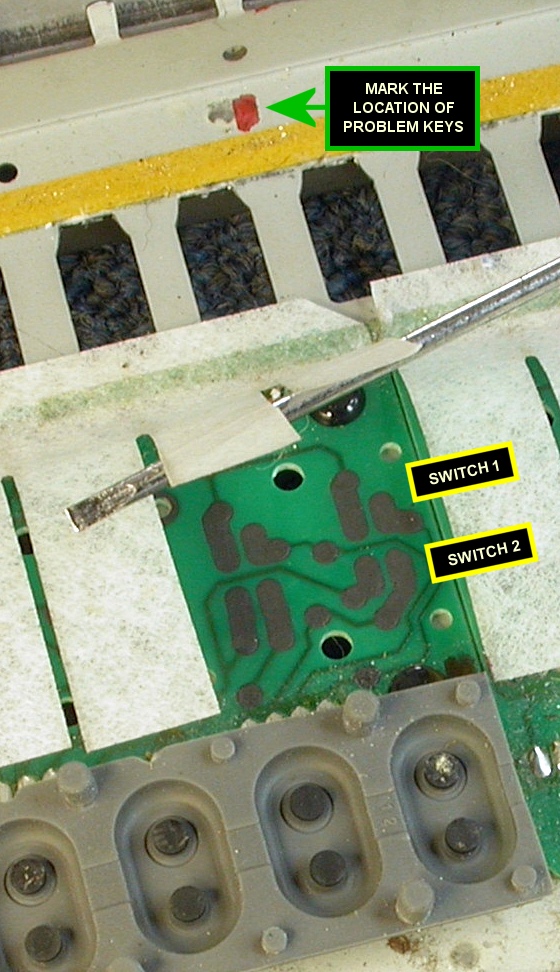
We also mark on the keybed the locations of the keys that were misbehaving (see right). These marks clearly identify which key contacts need attention.
Notice that two switches close when a key is played (see right). Each switch comprises a pair of PCB contacts, plus a contact in the strip that electrically connects the pair when a key is pressed, thereby closing the switch. Because one of the strip contacts is taller than the other, SWITCH 1 closes before SWITCH 2. The duration between the two closures depends on how hard the key is struck—as the key is struck harder, the duration gets shorter. The MIDI note velocity value is determined by this duration. |
|
|
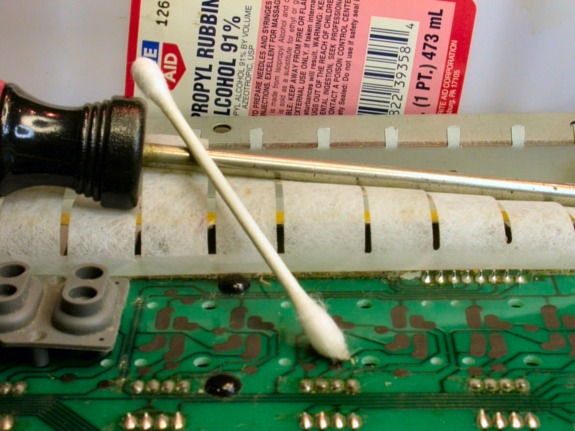
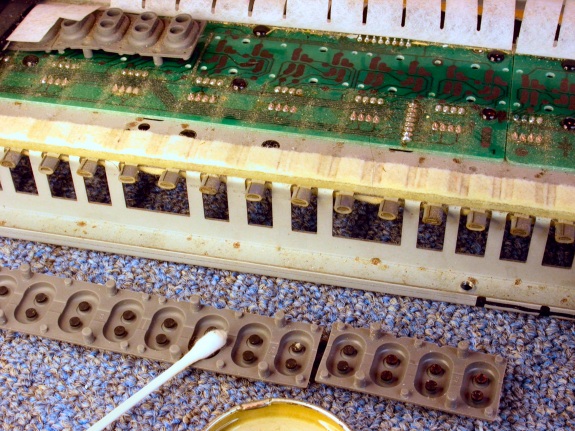
Cotton swabs and isopropyl alcohol are recommended for cleaning these key contacts. Wash your hands before handling the contact strips in case you should touch the carbon contacts. The alcohol percentage must be at least 91%. Weaker solutions don't evaporate quickly and water damage can occur. Even a 97% solution could take a day or two to dry out before the contacts operate normally. |
|
|
You should just barely moisten the cotton and then softly swab the contacts. Use a magnifying glass to identify tiny specs that need removal. Clean both the two contacts on the rubber strip and the four contacts on the PCB for each problem key. |
|
|
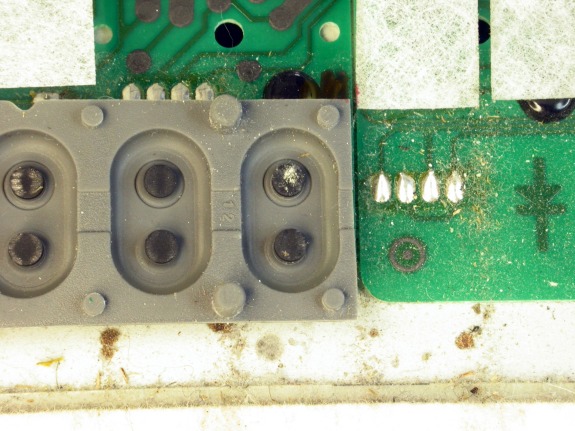
In addition to cleaning the electrical contacts, also swab away debris from (1) inside the rubber domes, (2) on the bottom surface of the strips, and (3) on the PC Board. You don't want any debris to work its way under the strips. When a strip is ready to reinstall, inspect it again under a magnifier. Blow or brush away any remaining specs. Sometimes, a carbon contact can tear away from the rubber, so also check for any tearing at the base of the contact. Damaged strips should be replaced with NEW KEY CONTACT STRIPS, available in our Parts Shop. |
|
|
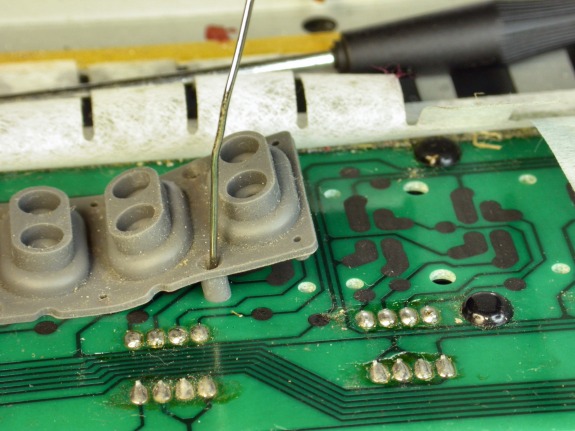
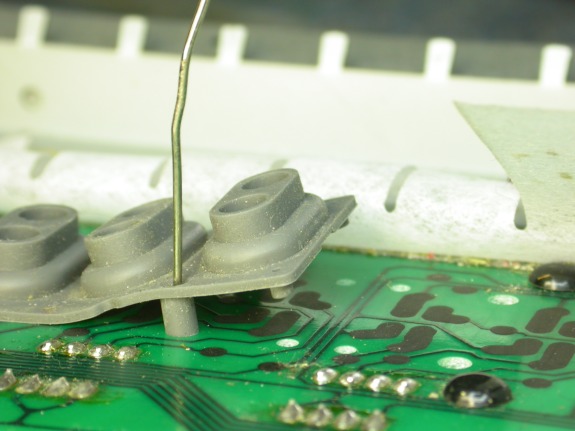
After everything is clean, use a straightened paper clip to reinstall the strips, inserting the big pips into their holes first, then the small ones. Be sure to install the strips with the proper edge toward the front of the keyboard. Otherwise, note velocity sensing won't work properly. |
|
|
After inserting all the pips, go over them again, making sure they're fully seated, and that the strip base is flat against the PC board at all points. You can run you fingernail along the strip's edges to make sure there are no air gaps between the strip and the board. Pay special attention to the strips' corners because they're the most prone to lifting up. Don't panic if the keyboard gets worse after cleaning. It can take a day or two for the contacts to fully dry out. |
|
| Roland® D-50 | ||
|---|---|---|
|
Last Page < |
Page Top ∧ |
Next Page > |
|
|
|
Page design and content Copyright © Richard Diemer - All rights reserved |