| BustedGear.com |
| Shop | Repairs | Manufacturers | Resources | iFAQs | About |
|
|
|||
| Moog® Prodigy | 1: Key Contact Cleaning | ||
|---|---|---|---|
|
Last Page < |
Page Bottom ∨ |
Next Page > |
|
|
|
|||
|
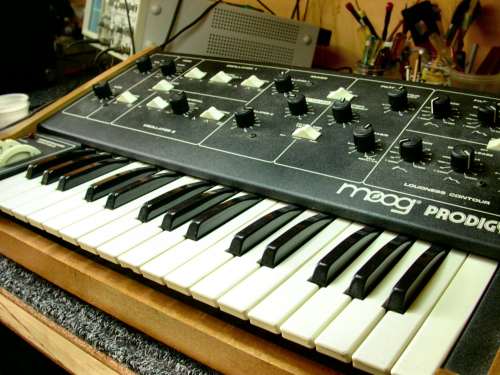
To remove the keyboard assembly from a Moog Prodigy, first unplug the unit from the wall. Then remove the four wood screws that attach the bottom tray to the wooden side panels. Also remove one sheet-metal screw attached to the rear panel. Carefully lift the top assembly off of the bottom tray. An electrical cable runs between them but it's comfortably long. Finally, remove four machine screws that hold the keyboard assembly to the bottom tray. |

|
|---|---|
|
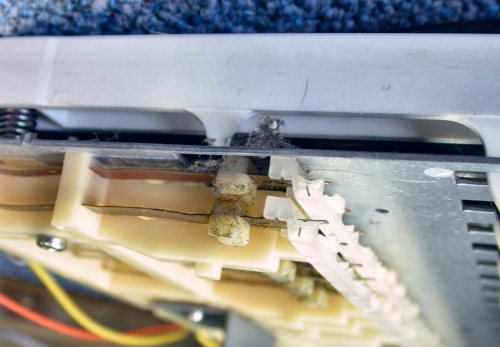
This photo shows a key pushing down on two conductive leaf springs stacked beneath it. Two nylon strips run below the springs, each holding a thin bus wire. When a key is pressed, each leaf spring touches and applies a voltage to one of the buses. One contact passes a voltage proportional to the note. A few milliseconds later, the other contact passes a voltage to trigger the sound of that note. The first step in cleaning contacts is to brush away loose dirt and debris from around the contacts. Use a small paint brush, artist's brush, or compressed air. |

|
|
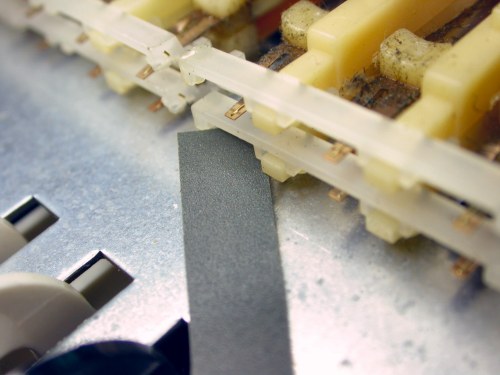
Simply spray-cleaning key contacts isn't usually so effective. You'll need to find a way to polish them a little. Maneuver something in between the bus bars and the leaf spring wires, but nothing too abrasive. A narrow strip of #800 emery paper is nice but a bit flimsy. Folding it helps. You might also be able to use a burnishing tool of some kind. 
|

|
|
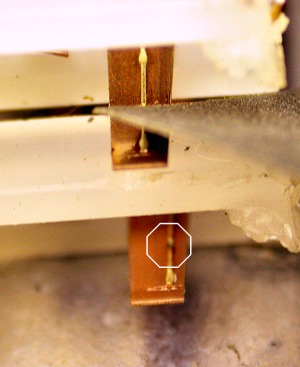
The lower contact wire in this photo is darkened by electrical oxidation (burning) of its surface. You want to erase the oxidized material without removing additional gold plating. Your eyes can't get close enough to see this oxidation so your ears will have to tell you when they're clean. Use an organ sound to test for solid, reliable contact. Use a percussive sound make sure there's no double triggering. |

|
| Moog® Prodigy | ||
|---|---|---|
|
Last Page < |
Page Top ∧ |
Next Page > |
|
|
|
|
|
Page design and content Copyright © Richard Diemer - All rights reserved |