| BustedGear.com |
| Shop | Repairs | Manufacturers | Resources | iFAQs | About |
|
|
|||
| M-Audio® Keystation 88es | 1: Disassembly | ||
|---|---|---|---|
|
Last Page < |
Page Bottom ∨ |
Next Page > |
|
|
|
|||
|
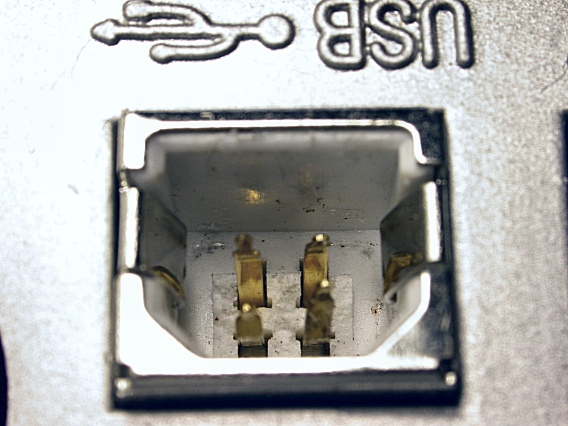
The photo on the right shows a broken USB jack on the rear of an M-Audio Keystation controller. The center post of the jack has broken away. Below, you see an unbroken jack. 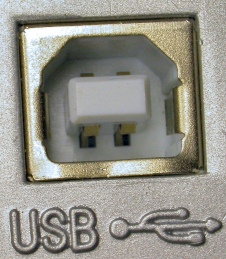
|
|
|---|---|
|
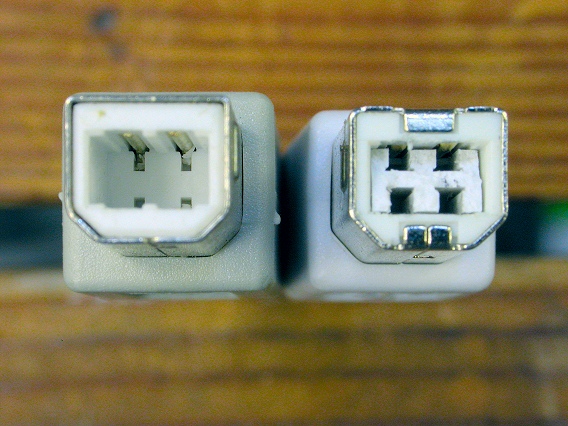
The photo on the far right shows the missing center post stuck inside the plug of the USB cable. A normal plug is shown on the left. |
|
|
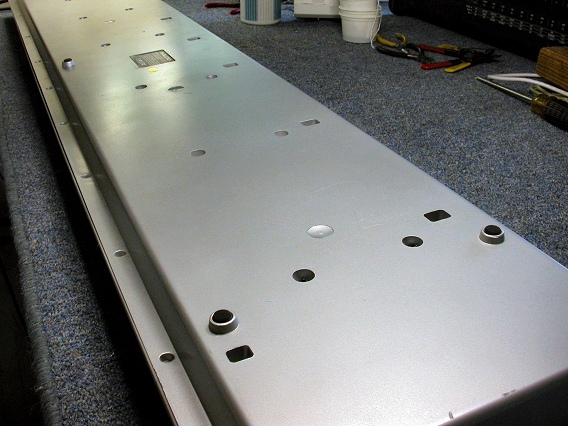
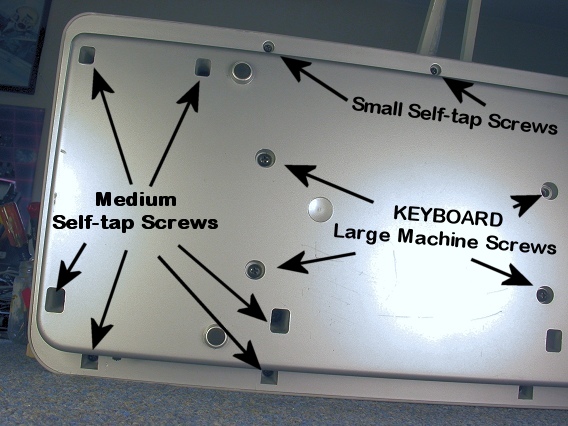
Before you disassemble the Keystation, pull off the volume slider knob. Then, flip over the controller and lay it on its top, as shown here. Look at the mounting holes and screws on the bottom. Three different screw types are used. |
|

Fourteen, LARGE Machine Screws hold in the KEYBOARD assembly. Since we don't need to take it out, you can leave these KEYBOARD screws in place. Twenty, MEDIUM Self-tap Screws and nine, SMALL Self-tap Screws hold down the top panel and must be removed. The MEDIUM screws go into the deep rectangular holes. The SMALL screws go into the small round holes along the front edge of the keyboard. (See photo.) |
|
|
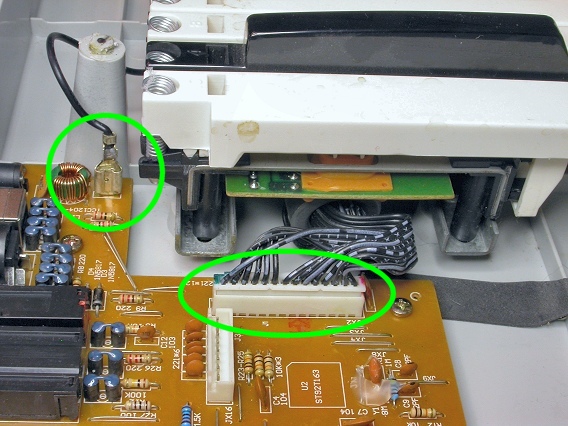
Here, the self-tap screws are removed and the top panel is lifted. To fully remove the top, carefully unplug three, multi-pin PCB connectors. The connectors are shown unplugged and circled in this photo. |

|
|
Next, unplug two additional connectors, so you can take out the PC Board needing repair. The connectors are circled here. |
|
|
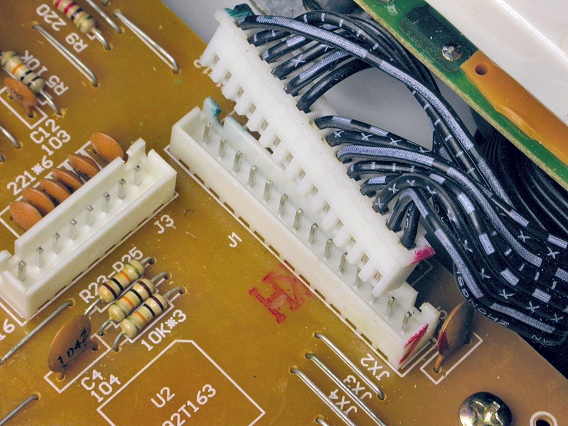
One is a multi-pin cable between this PCB Assembly and the keyboard's PCBA. Simply pull the female socket out of the male PCB header, as shown here. The header's shroud is keyed so you can't misalign the socket. |
|
|
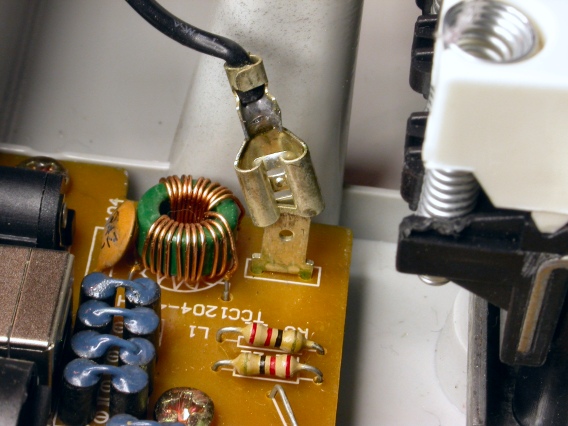
The other is a female disconnect on a male spade lug. Pull the disconnect off the lug, as shown here. This is a ground wire from the PCB to the frame of the keyboard assembly. |
|
| M-Audio® Keystation 88es | ||
|---|---|---|
|
Last Page < |
Page Top ∧ |
Next Page > |
|
|
|
|
|
Page design and content Copyright © Richard Diemer - All rights reserved |