| BustedGear.com |
| Shop | Repairs | Manufacturers | Resources | iFAQs | About |
|
|
|||
| Roland® D-50 | 1: Disassembly | ||
|---|---|---|---|
|
Last Page < |
Page Bottom ∨ |
Next Page > |
|
|
|
|||
|
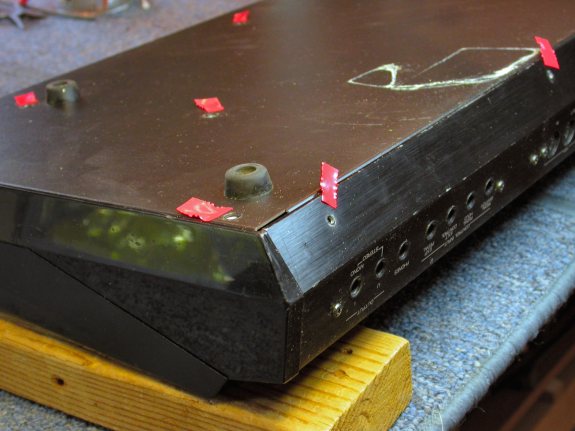
To disassemble the Roland D-50, place the keyboard upside down. But don't rest it on the instrument's joystick or its left-hand bender wheel. The joystick is especially easy to damage. As this photo shows, we supported the instrument with wooden blocks. Remove all of the bottom screws except those that attach the feet (see right). Also remove five smaller screws from along the bottom of the rear panel. |
|
|---|---|
|
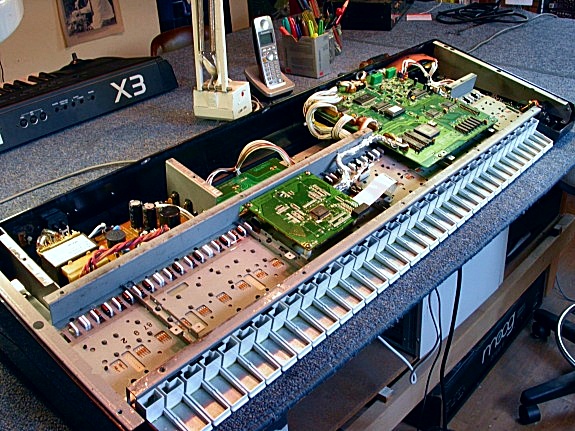
Then, lift off the bottom tray and set it aside. |
|
|
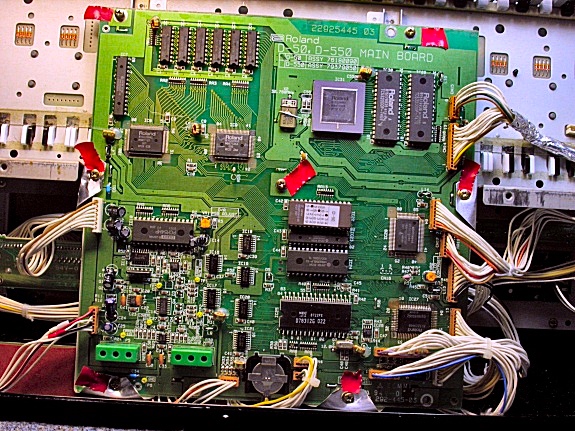
The D-50's computer board, seen here, blocks access to the keybed and needs removal next. Seven brass screws, marked with red tape in this photo, hold down the board. Once the board is loose, swing it up and away from the key frame. No cables need disconnecting but you'll have to cut a couple of plastic cable ties. |
|
|
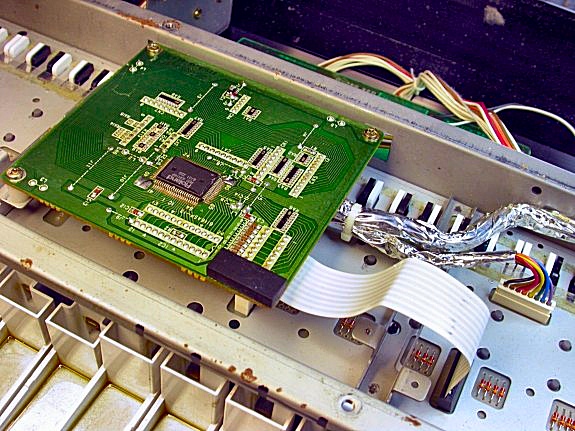
Next, detach the Key Scan circuit board (see right) by first removing the three brass screws that hold it down. |
|
|
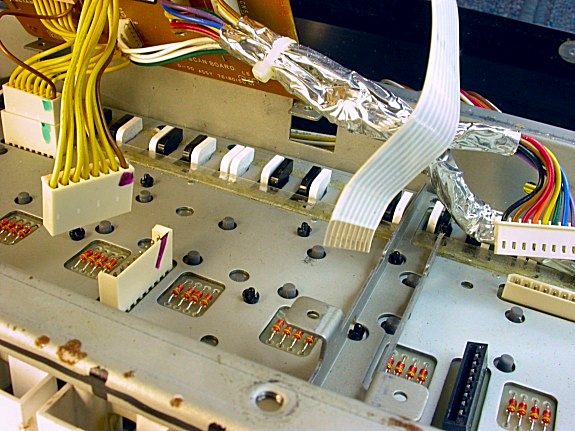
Then, unplug the four cables shown here. Two multi-pin plugs (with yellow wires) are hidden under the Scan board. The Scan board will now swing away from the keybed. The next task is to remove the Roland D-50 keybed. |
|
| Roland® D-50 | ||
|---|---|---|
|
Last Page < |
Page Top ∧ |
Next Page > |
|
|
|
|
|
Page design and content Copyright © Richard Diemer - All rights reserved |