| BustedGear.com |
| Shop | Repairs | Manufacturers | Resources | iFAQs | About |
|
|
|||
| Sequential Circuits Pro One | 1: Key Contact Cleaning | ||
|---|---|---|---|
|
Last Page < |
Page Bottom ∨ |
Next Page > |
|
|
|
|||
|
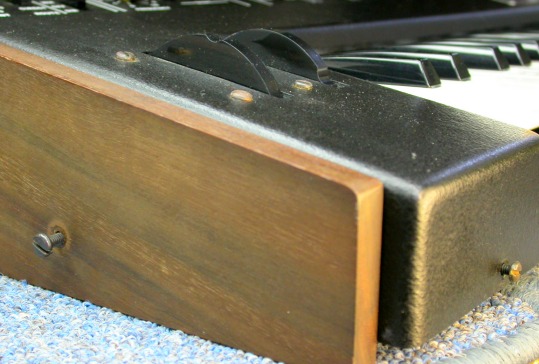
To remove the keyboard assembly from an SCI Pro-One, first unplug the synthesizer from the wall. Next, remove the wooden side panels (2 screws each) and 3 screws from the front lip. Also remove screws at the top of the rear panel. Then, carefully separate the control panel from the bottom tray and keyboard. Finally, unscrew the keyboard assembly from the bottom tray. There are two front feet screws and two silver screws. |
|
|---|---|
|
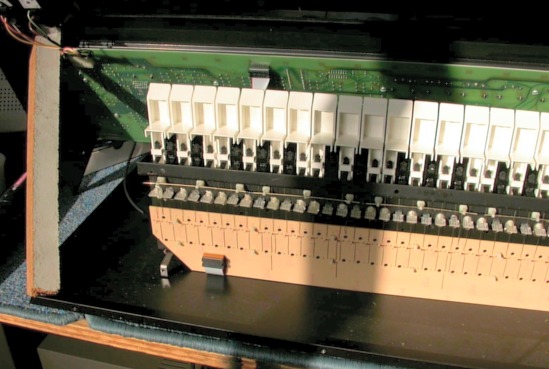
Prop up the control panel and set the keyboard on its back edge (right). This lets you power up and play the keys during cleaning. Take care not to yank on the ribbon cable that connects the control panel to the underside of the keyboard. Before unplugging this cable, make a diagram or mark reminding you of which way it plugs into the socket. Use an IC puller or a small screwdriver to gently pry the 16-pin plug out of its socket. |
|
|
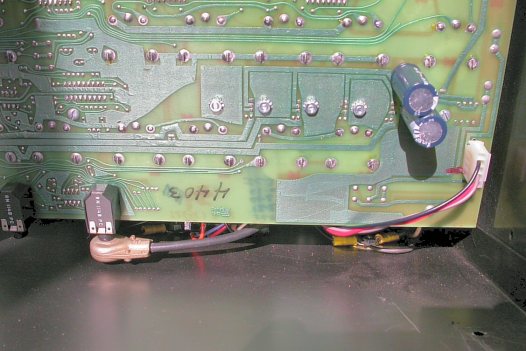
It might help to use an amplifier cord with a right-angle plug, as shown here. Note the power supply connector on the right. Make a red mark to identify its orientation in case it gets unplugged. |
|
|
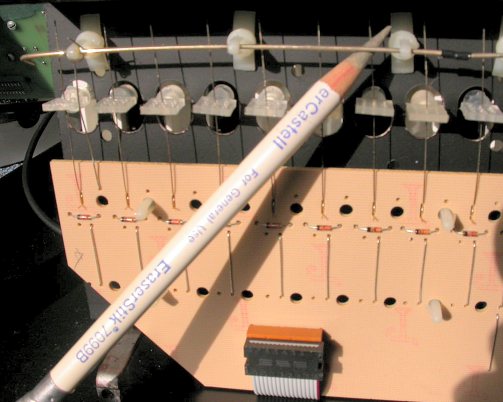
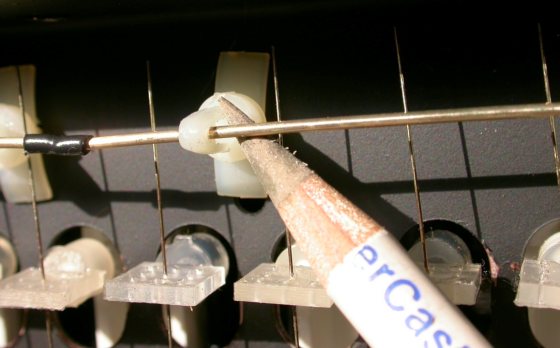
If many notes are misbehaving, detach the ribbon cable, lay the keyboard bottom-up, and pre-clean all the contacts. Erase each J-wire where it hits the bus bar. J-wires are strong but springy. To give one a good polish, you might need to push back on its opposite side with a spare finger. Also erase the bus bar in those areas where J-wires contact it. Then reattach the keyboard to the control panel and power up the synth. |
|
|
Using an organ sound, press each key four or five times. If a note doesn't fire solidly, clean its contacts again. Then program a percussive sound: "0" attack setting, short decay setting, and "0" sustain setting. Repeatedly press each key and make sure its note fires just once for each keystroke, whether rapid or slow. Sometimes a J-wire needs bending to contact the bus bar more firmly or in a less worn spot. |
|
| Sequential Circuits Pro One | ||
|---|---|---|
|
Last Page < |
Page Top ∧ |
Next Page > |
|
|
|
|
|
Page design and content Copyright © Richard Diemer - All rights reserved |