| BustedGear.com |
| Shop | Repairs | Manufacturers | Resources | iFAQs | About |
|
|
|||
| Vox Valvetronix | 1: Removing the Control PCB | ||
|---|---|---|---|
|
Last Page < |
Page Bottom ∨ |
Next Page > |
|
|
|
|||
|
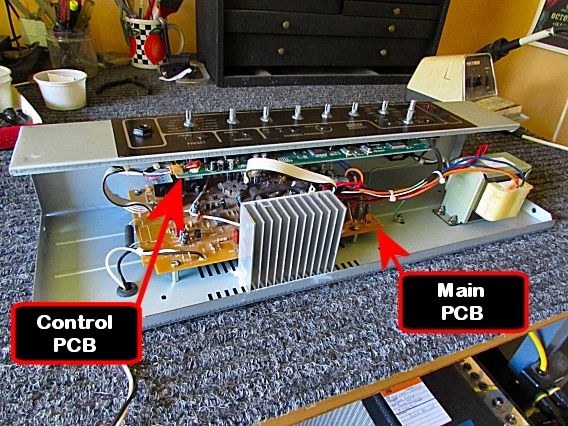
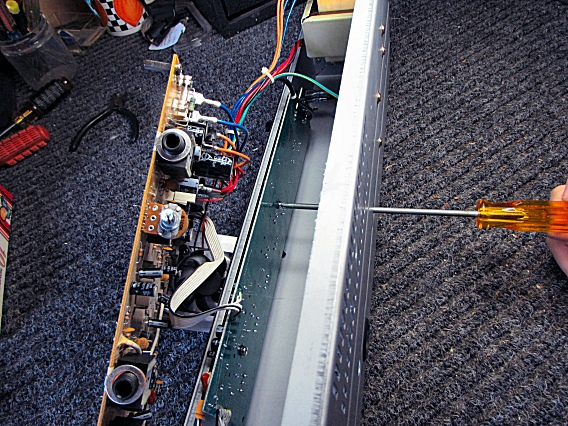
The worn-out volume pot we want to replace is located on the Control PCB. The control board mounts with screws that are hard to access—the Main PCB is in the way. A right-angle screwdriver could be employed but tight spaces make the work difficult. Instead, you can loosen the main PCB and get it out of the way. Holes in the bottom of the chassis then make the control board's screws easy to extract. Some versions of the main board have holes for a screwdriver shaft but this version doesn't. |
|
|---|---|
|
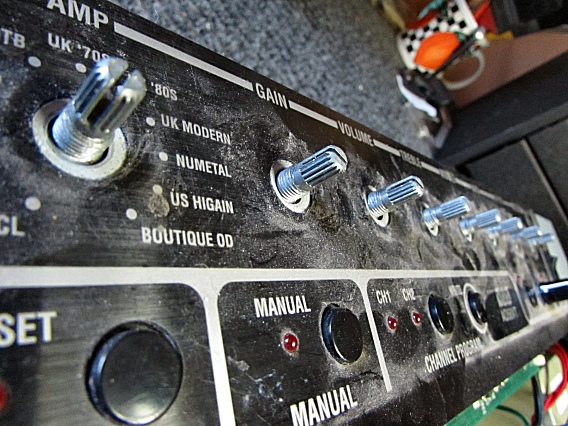
To prepare for removing the control board, take off all the control knobs and control nuts. Note: When the control board is out, it's easy to clean the control panel! |
|
|
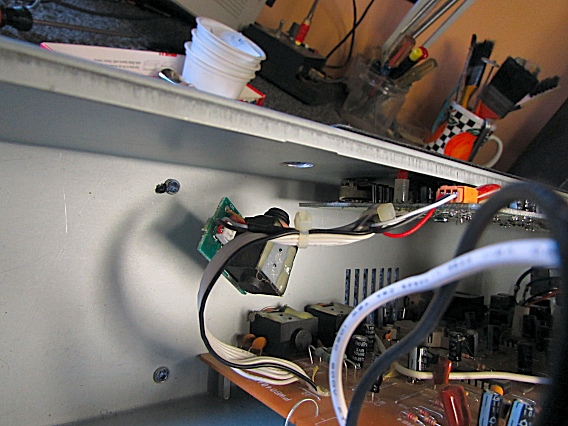
You must also remove the nut from the input jack, loosening its small PCB. |
|
|
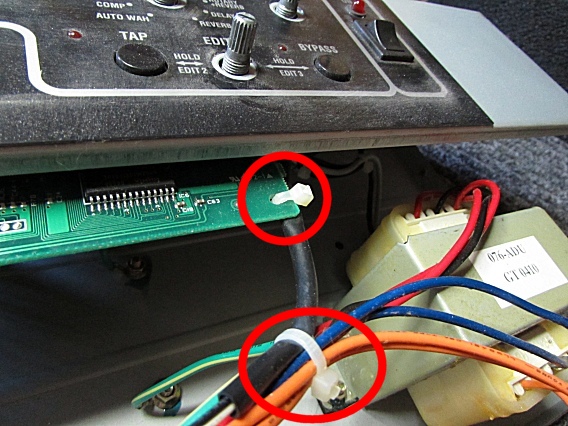
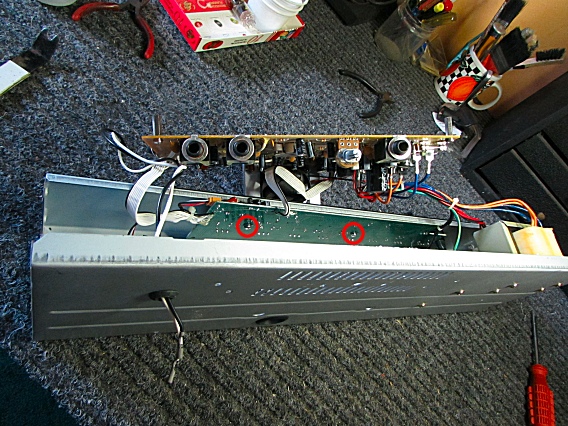
Finally, snip the 2 cable ties circled in red. |
|
|
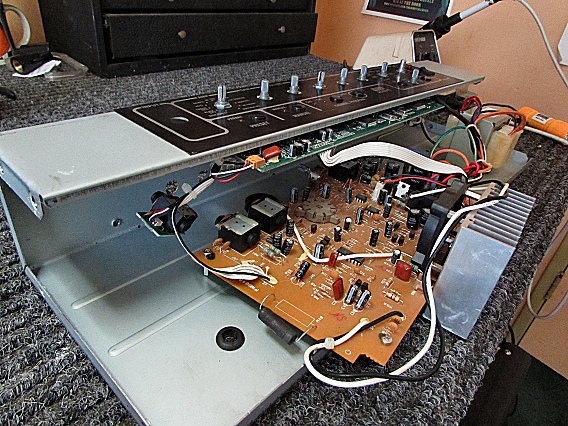
Here, the main assembly is loose and ready to pull out of the way. Our VOX AD50VT DISASSEMBLY PAGE shows you how to remove the Valvetronix chassis from the cabinet and how to loosen the main assembly. |
|
|
Now, with the chassis set on its rear, you can swing the main PCB and its heatsink out of the chassis, exposing the two control board screws (right). |
|
|
You'll find access holes in the bottom of the chassis for a screwdriver. |
|
| Vox Valvetronix | ||
|---|---|---|
|
Last Page < |
Page Top ∧ |
Next Page > |
|
|
|
|
|
Page design and content Copyright © Richard Diemer - All rights reserved |