| BustedGear.com |
| Shop | Repairs | Manufacturers | Resources | iFAQs | About |
|
|
|||
| Moog® Micromoog | 1: Disassembly & Cleaning | ||
|---|---|---|---|
|
Last Page < |
Page Bottom ∨ |
Next Page > |
|
|
|
|||
|
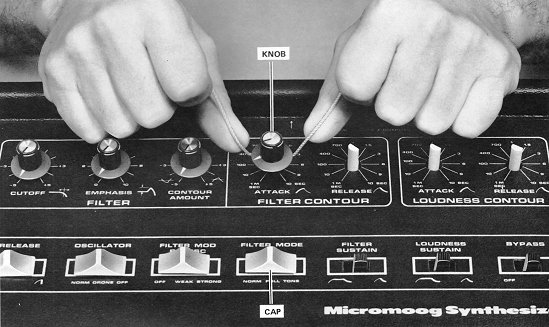
To clean the Micromoog's control pots and switches, the main printed circuit board must be removed. So, first pull off all the panel knobs and switch caps. If the knobs are tight, use a piece of twine as shown here. If you're just going to clean the key contacts, knob removal isn't necessary.
Photo © 1979 Moog Music, Inc. |
|
|---|---|
|
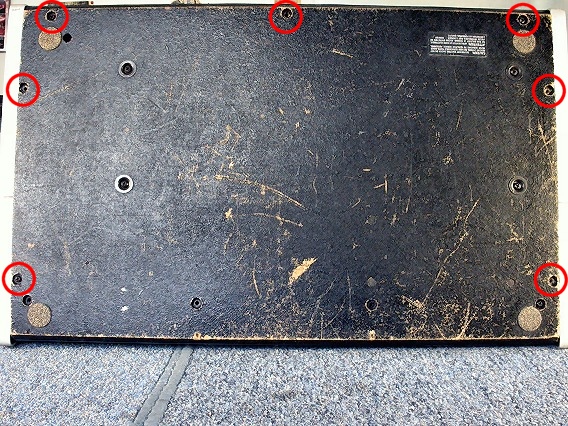
To separate the top panel from the wooden base, remove 7 sheet metal screws from the holes circled here. |
|
|
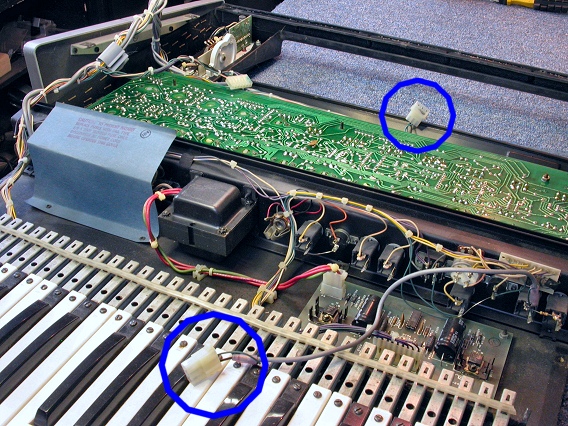
An inline Molex plug and socket (right, circled in blue) connect the main printed circuit board to the audio output jack. Unplug this 3-pin connector. |
|
|
Also unplug the 7-pin socket (right) connecting to the Mod Wheel assembly. The 3-pin socket next to it can remain connected. |

|
|
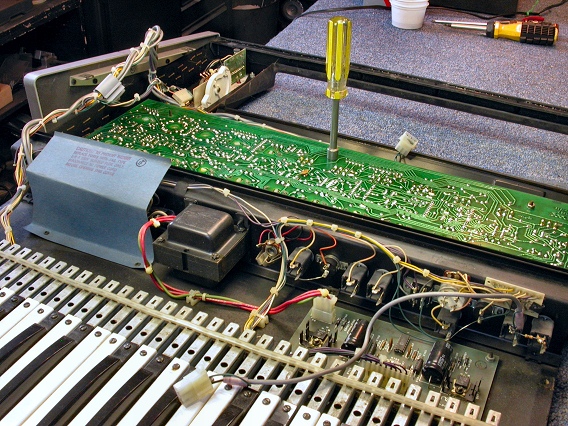
Use a 5/16" nut driver to remove the six hex nuts holding the circuit board to the top panel. A flat washer and a lock washer are under each nut. |
|
|
The circuit board will now lift out of the top panel. |
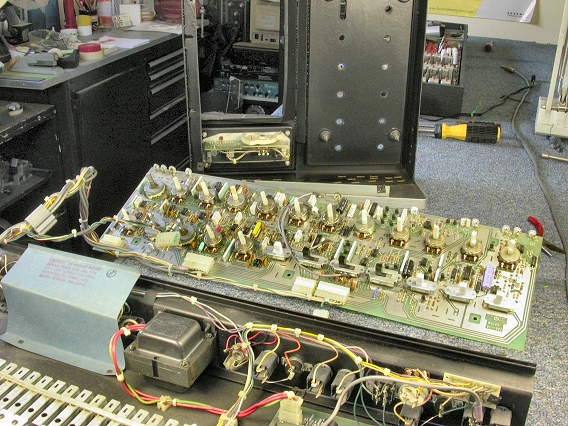
|
|
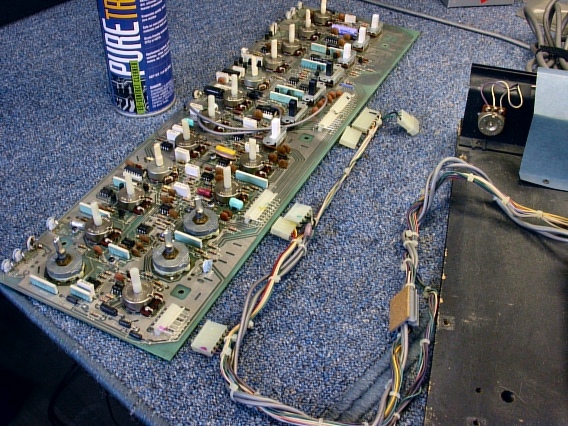
Five Molex headers and sockets interconnect the pc board to the wiring harness. Unplug the socket housings, as shown here. This makes the board easier to handle. If header pins look dull or dirty, spray them with contact cleaner and slide the socket on and off a few times.
|
|
|
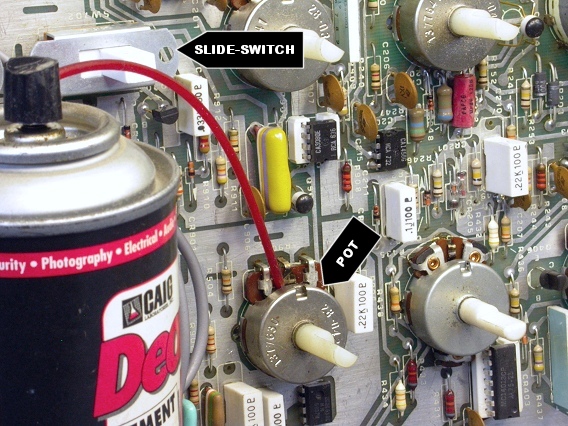
This photo shows how to apply a short burst of contact cleaner into one of the potentiometers. Afterward, rotate the pot a dozen or more times from one extreme to the other. Also, squirt the slide-switch contacts and flip them on and off multiple times. Clean every pot and slide switch. Unfortunately, there's no opening for cleaning the contacts of the 3 rotary switches (OCTAVE, MOD SOURCE, & MOD ROUTING). |
|
| Moog® Micromoog | ||
|---|---|---|
|
Last Page < |
Page Top ∧ |
Next Page > |
|
|
|
|
|
Page design and content Copyright © Richard Diemer - All rights reserved |