| BustedGear.com |
| Shop | Repairs | Manufacturers | Resources | iFAQs | About |
|
|
|||
| Roland® TR-808 | 4: Step Switch Repair | ||
|---|---|---|---|
|
Last Page < |
Page Bottom ∨ |
Next Page > |
|
|
|
|||
|
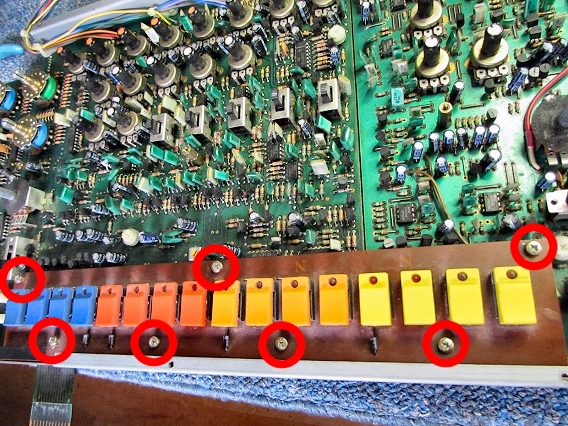
To service a step switch in a TR-808, you must dismount the Switch Board from the Main Board. Simply remove the seven gold screws shown circled in this photo.
|
|
|---|---|
|
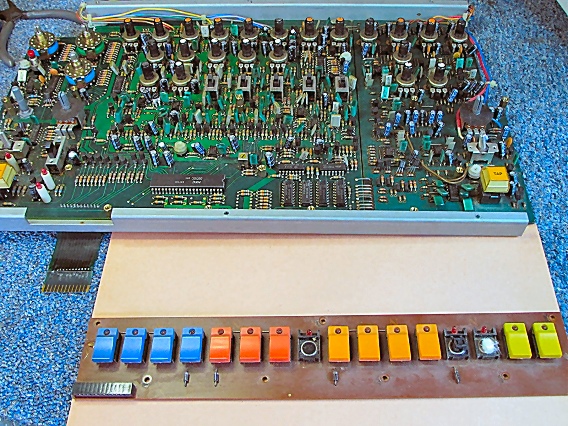
Here you see a Switch Board, unscrewed and unplugged from its Main Board.
|
|
|
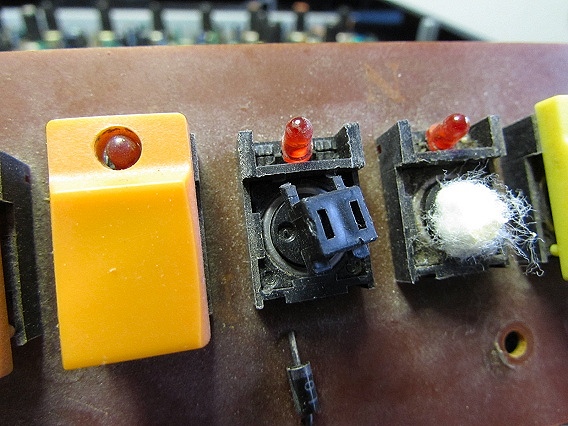
Several switch "actuators" had broken on this board. As you can see, a ball of cotton was used as a temporary fix. Actuators can break when the buttons are pushed too hard. The buttons are often pushed too hard when the electrical switch is wearing out. It's a good idea to replace the underlying "tactile" switch of any intermittent button. |
|
|
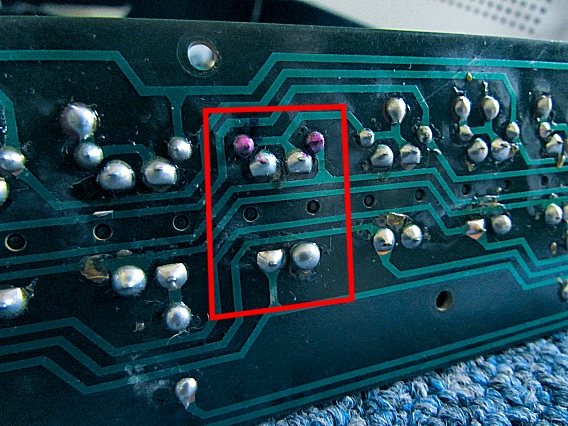
To replace a worn-out tactile switch or broken actuator, first unsolder the whole switch assembly from the circuit board. In this photo, a red box outlines the six solder points that belong to one step switch. The two purple points connect to the LED and the other four points connect to the tactile switch. |
|
|
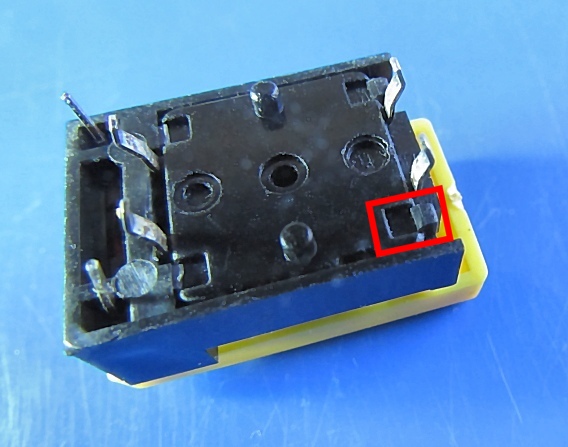
Here you see the underside of a complete step-switch. It's comprised of a 4-legged "tact" switch, a surrounding actuator, a colored cap or button, and an LED. Notice how the tactile switch fits into the actuator frame. At the front, two plastic clips snap into grooves on the bottom of the tact switch. (right) |
|
|
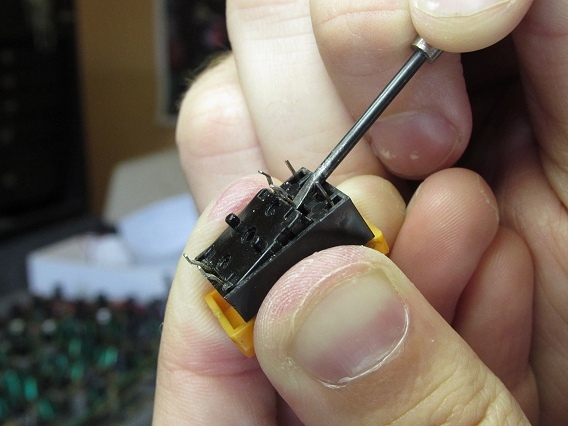
To remove a tact switch from its actuator, use a small screwdriver to pry up the rear of the switch, as shown here. Then pull the front of the switch out from under the front clips. |
|
|
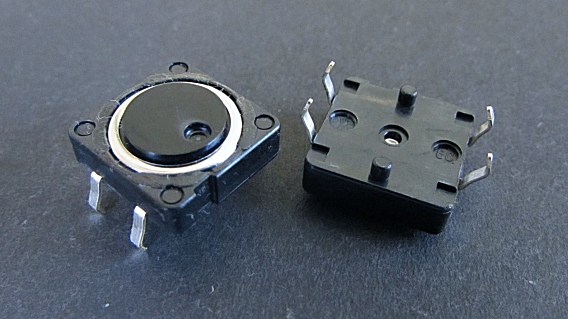
These are the replacement switches we use when restoring a Roland TR-808 Rhythm Composer.
They're fresh-production parts, not old stock, and you can order them here: |
|
|
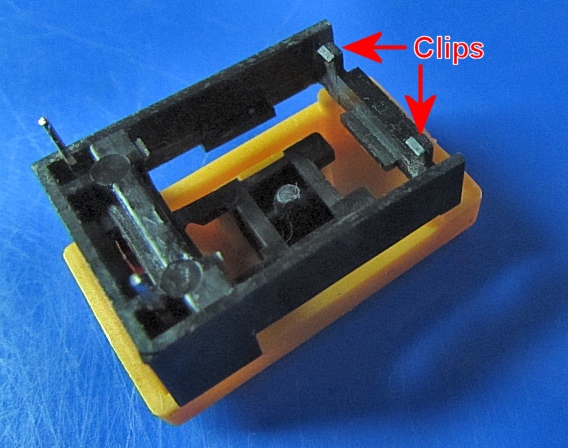
This is a good actuator that's all ready for a new switch. To insert a new switch, first slide one of its two-legged edges under the front clips (right), then push down the opposite edge. |
|
|
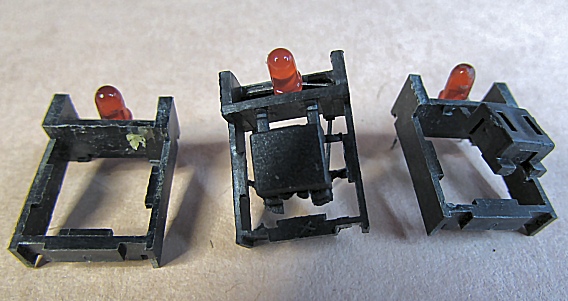
Here you see several actuators. The LED indicator mounts through the back of the frame and can be replaced with a standard, T-1¾ (5mm ⌀) LED. The actuator on the left in this photo is missing the hinged pad that actually actuates the tact switch. The actuator on the right has a partially broken hinge. In the middle is a replacement actuator that turned out to be slightly different from the original. We had to modify it in order for the original cap to fit. |
|
|
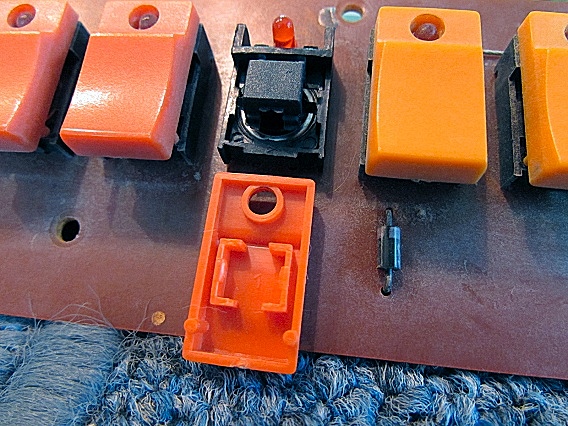
As you can see here, caps are designed to pull off the actuator and be interchanged. |
|
| Roland® TR-808 | ||
|---|---|---|
|
Last Page < |
Page Top ∧ |
Next Page > |
|
|
|
|
|
Page design and content Copyright © Richard Diemer - All rights reserved |