| BustedGear.com |
| Shop | Repairs | Manufacturers | Resources | iFAQs | About |
|
|
|||
| Korg® Triton Pro | 2: Left Button Board Removal | ||
|---|---|---|---|
|
Last Page < |
Page Bottom ∨ |
Next Page > |
|
|
|
|||
|
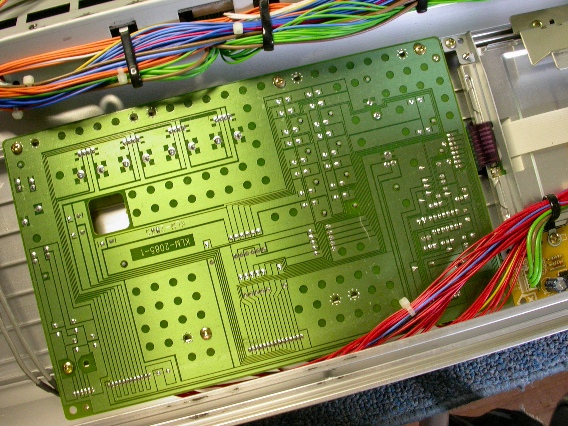
The Left Button board, seen here, is now exposed. If you haven't yet pulled off the four rotary knobs on the left side of the Triton's control panel, do that now. To release the circuit board, remove all the gold-colored screws attaching it to the top panel. Then begin to carefully lift up the board. |
|
|---|---|
|
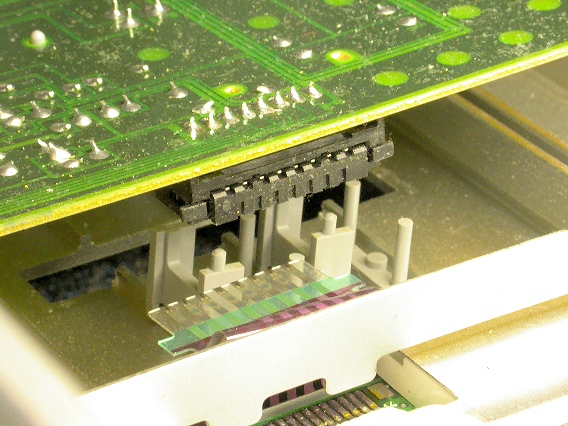
You'll see a flat flexible cable (FFC) connecting the Left Button board to the Triton's LCD assembly. |

|
|
With the board slightly raised, you can grab and slide the FFC out of its connector as shown here. When reinstalling the Button board, connect the FFC before fully dropping the circuit board into the chassis. |
|
|
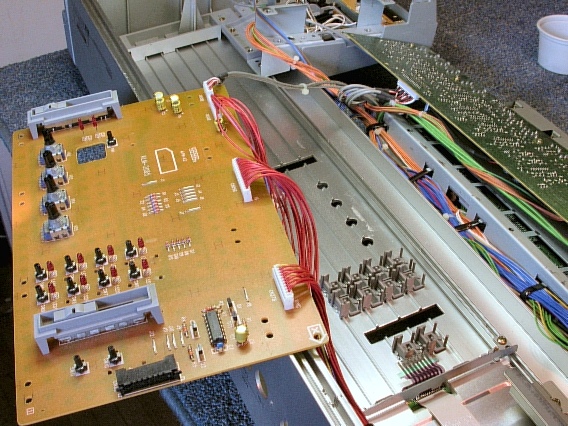
Now you can flip over the Left Button board and unplug four more cable assemblies. |
|
|
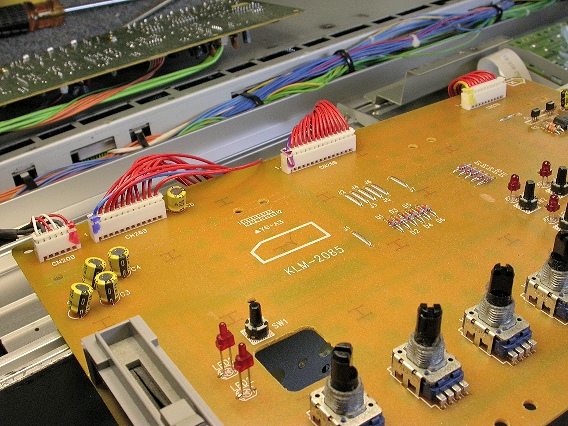
Three of them have mostly red wires (CN25B, CN26B, CN27B) and one has a couple of shielded cords (CN20B). Use a Sharpie® to mark the cable headers, as shown here, so they'll be easier to find and reconnect during reassembly. |
|
|
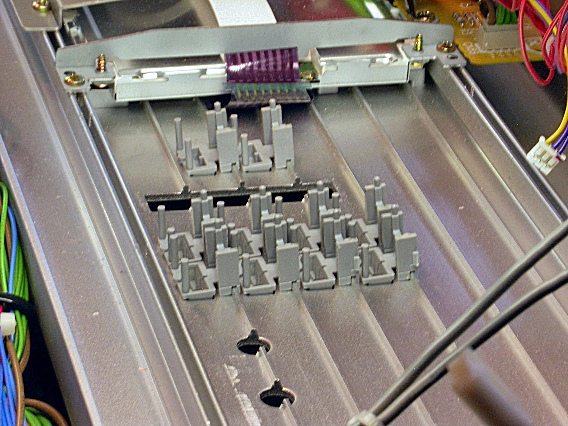
With the Left Button board out of the unit, you'll see the plastic knob blocks that operate the tactile switches. |
|
| Korg® Triton Pro | ||
|---|---|---|
|
Last Page < |
Page Top ∧ |
Next Page > |
|
|
|
|
|
Page design and content Copyright © Richard Diemer - All rights reserved |