| BustedGear.com |
| Shop | Repairs | Manufacturers | Resources | iFAQs | About |
|
|
|||
| Moog® Rogue | 2: Main Board Removal | ||
|---|---|---|---|
|
Last Page < |
Page Bottom ∨ |
Next Page > |
|
|
|
|||
|
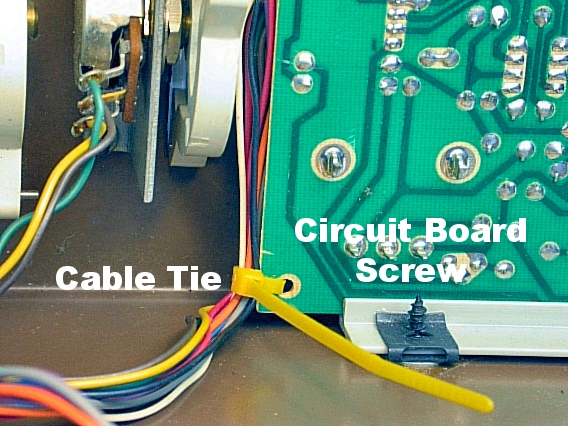
Here you see one of three screws that attach the Rogue's main circuit board to its rear panel. There is a silver flat washer in between the rear panel and a board holder.
Cut the cable tie next to this mounting screw and add a new one during reassembly. |
|
|---|---|
|
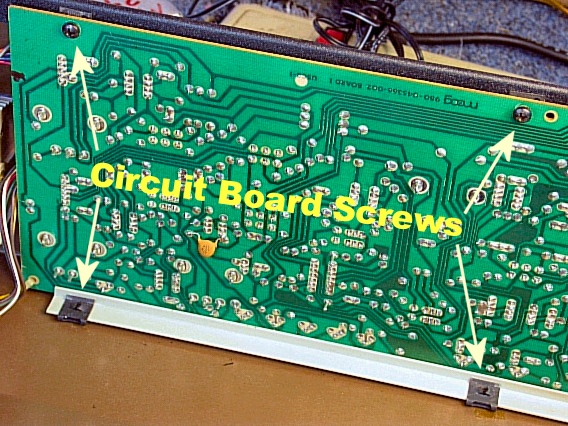
Three more screws attach the Rogue's main board to its top panel, totaling six screws to remove. Before taking out the board, center all of its lever switches so their handles stick straight up (even if that's an in-between position). This lets all of the switch handles pass easily through the front panel cutouts. |
|
|
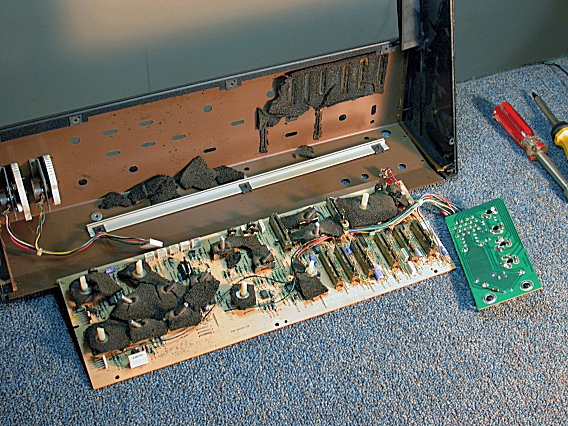
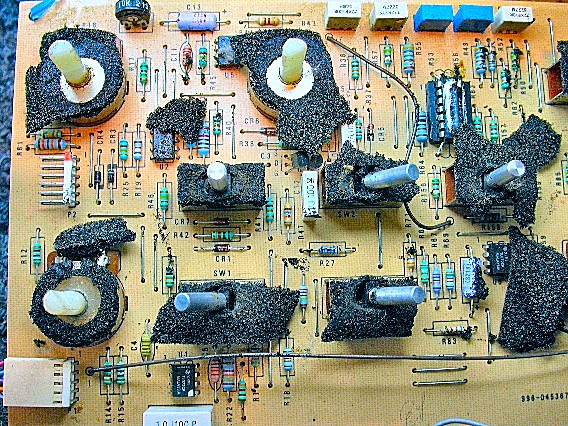
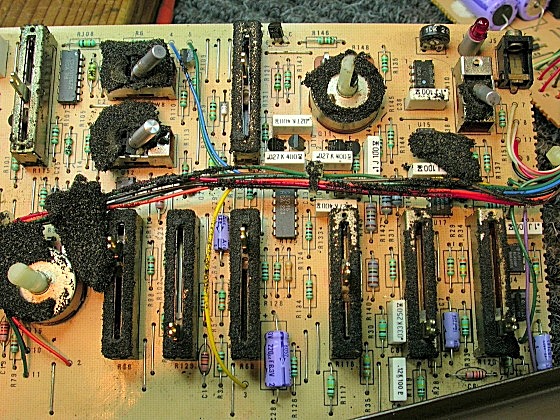
With the main board removed, we discovered an unexpected problem. The foam pads between the circuit board and the top panel had "melted" onto the board and panel. The pads are mostly cosmetic, hiding the electrical parts from view. They may also have blocked some dust or debris. Nevertheless, the melted goo can ruin the parts, so all the foam should be removed. |
|
|
Before working on the main board, unplug the two connectors seen here. The 5-pin connector goes to the keyboard assembly and the 6-pin connector goes to the pitch and modulation wheels. |

|
|
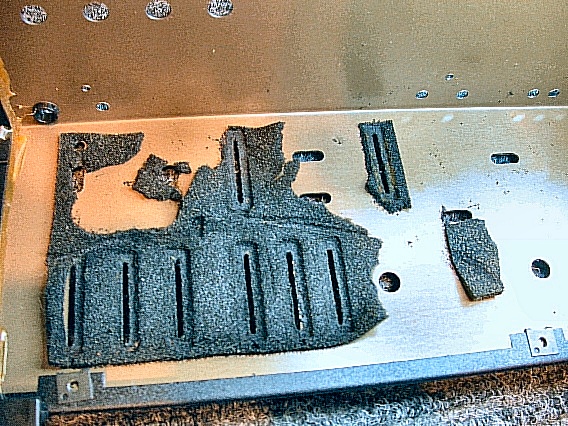
Decomposed petrochemical foam is a result of age and is no stranger to the vintage repair shop. |
|
|
Use an X-Acto knife to scrape the goo off the pots and switches, being careful not to let it get inside the parts. |
|
|
The same goes for the slide pots. |
|
| Moog® Rogue | ||
|---|---|---|
|
Last Page < |
Page Top ∧ |
Next Page > |
|
|
|
|
|
Page design and content Copyright © Richard Diemer - All rights reserved |