| BustedGear.com |
| Shop | Repairs | Manufacturers | Resources | iFAQs | About |
|
|
|||
| Yamaha® MOTIF 6 and 7 | 4: Shielding Cage | ||
|---|---|---|---|
|
Last Page < |
Page Bottom ∨ |
Next Page > |
|
|
|
|||
|
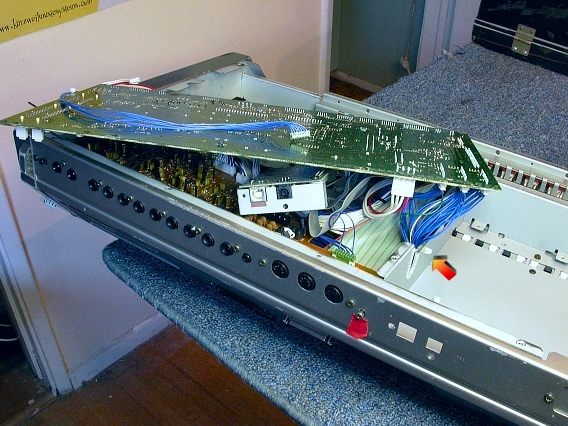
Begin removing the shielding cage by taking out the rear panel screw marked with red tape in this photo. Then unsnap the push-mount cable tie indicated by a red arrow in the photo. |
|
|---|---|
|
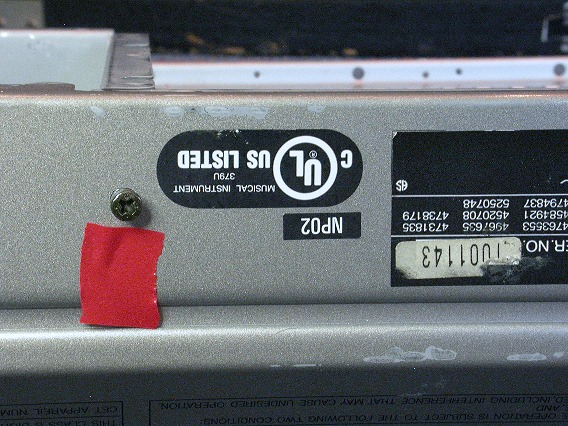
Remove a second rear-panel screw, shown here. |
|
|
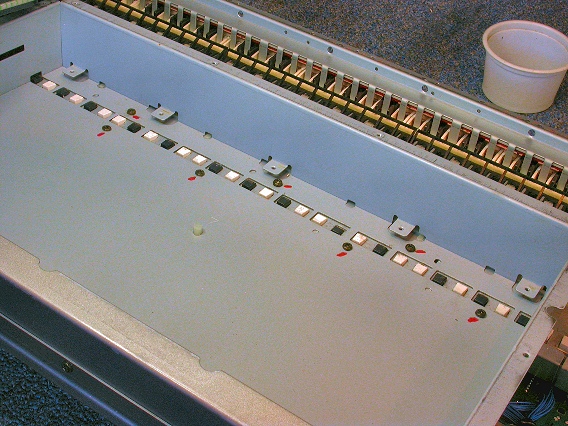
Inside the cage, take out all seven of the black mounting screws. These screws are a bit shorter than the rear panel screws. Since there are extra holes in the cage, mark the holes that are actually used. This will speed up reassembly. |
|
|
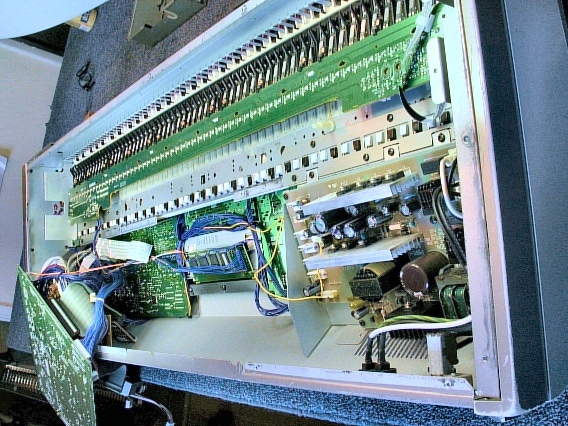
With the cage out of the way, you'll see the LCD assembly and, beneath that, the center button board. On the left is the left button board. On the right is the power supply unit and, beneath that, the right button board. |
|
|
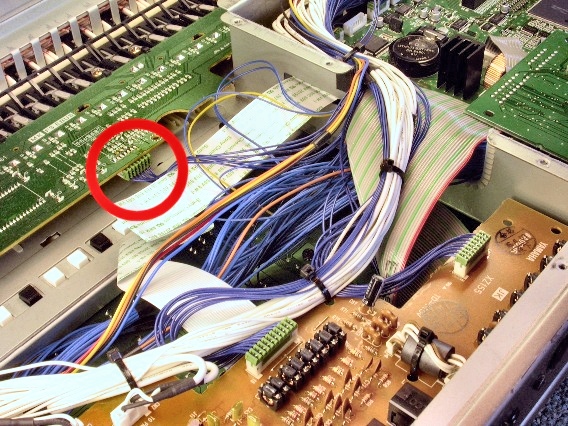
The keyboard assembly is removed next. First, disconnect the keyboard cable. In the MOTIF6, the connector is on the left, shown here circled in red.
|
|
|
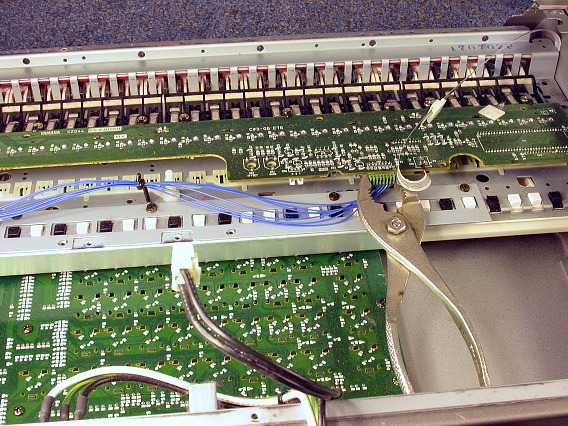
In the MOTIF7, the connector is on the right. A pliers can help to pull off the connector, as shown here. Notice that the power supply unit has been removed. It isn't necessary to remove the power supply unless you're removing the right button board. |
|
| Yamaha® MOTIF 6 and 7 | ||
|---|---|---|
|
Last Page < |
Page Top ∧ |
Next Page > |
|
|
|
|
|
Page design and content Copyright © Richard Diemer - All rights reserved |